目录
ToggleCalibration: The First Step to Accuracy
One of the most critical steps in ensuring the accuracy of your digital illuminance meter is regular calibration. Calibration is the process of adjusting the meter to ensure that its readings are accurate and consistent. Most manufacturers provide guidelines on how often to calibrate their devices, which can range from monthly to annually, depending on usage.
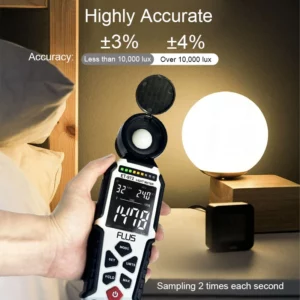
To calibrate your digital illuminance meter, follow these steps:
1. Refer to the User Manual: Each device may have specific calibration instructions. Always start by consulting the user manual for your particular model.
2. Use a Calibration Light Source: Obtain a light source with a known illuminance level. This could be a calibrated light bulb or a standard light source that has been tested for accuracy.
3. Take Readings: Position your digital illuminance meter at a specified distance from the light source and take readings. Compare these readings with the known values to determine if adjustments are necessary.
4. Adjust Settings: If your readings are off, follow the calibration procedure outlined in the manual to adjust the settings of your digital illuminance meter.
5. Document Calibration: Keep a log of your calibration dates and results. This documentation can be useful for future reference and for maintaining compliance with industry standards.
Environmental Factors: Control Your Testing Conditions
The environment in which you use your digital illuminance meter can significantly impact its accuracy. Here are some factors to consider:
1. Avoid Direct Sunlight: When taking measurements, ensure that your digital illuminance meter is not exposed to direct sunlight, as this can lead to inaccurate readings. Instead, take measurements in shaded areas or indoors.
2.M inimize Reflections: Reflections from surfaces can skew your readings. When measuring illuminance, try to position the meter away from reflective surfaces, such as glass or polished floors.
3. Temperature and Humidity: Extreme temperatures and humidity levels can affect the performance of your digital illuminance meter. Store and use the device within the manufacturer’s recommended temperature and humidity ranges.
4. Allow for Warm-Up Time: Some digital illuminance meters require a warm-up period before they provide accurate readings. Check the user manual for any specific warm-up instructions.
Proper Usage Techniques
To maximize the accuracy of your digital illuminance meter, it’s essential to use it correctly. Here are some best practices:
1. Positioning: Hold the meter at the correct angle and distance from the light source. The sensor should be facing the light source directly to capture accurate readings.
2. Multiple Readings: Take multiple readings in the same area and average them out. This practice helps account for any fluctuations in light intensity and provides a more reliable measurement.
3. Use the Right Settings: Ensure that your digital illuminance meter is set to the appropriate mode for the type of measurement you are taking. Some meters have different settings for indoor and outdoor measurements, as well as for different types of light sources.
4. Regular Maintenance: Keep your digital illuminance meter clean and free from dust and debris. Regularly check the sensor for any obstructions that could affect its performance.
Conclusion
Ensuring the accuracy of your digital illuminance meter is essential for obtaining reliable measurements in any lighting application. By following the steps outlined in this article—calibrating your device regularly, controlling environmental factors, and using proper techniques—the user can enhance the performance of your digital illuminance meter and achieve the best results in your projects.
0